Unity3D 3.x Plugin for Dynamic Font Text. unity-sysfont
지난 포스팅에서 유니티3D 3.x 버전에서 다이나믹 텍스트를 사용하기 위해 리서치를 해봤었는데요, 이번에는 리서치 해놓은 SysFont 플러그인을 적용해보는 것을 정리해보겠습니다. 4.x 버전의 유니티3D를 사용하신다면 위 링크에도 있듯이 SysFont를 사용하지 않으셔도 됩니다. 참고로, 제가 유니티3D 초보라 기초적인 이야기도 조금 있고 언제나 그렇듯 이슈들도 같이 정리합니다.
1. unity-sysfont 설치부터 데모 실행
 먼저 unity-sysfont의 github로 가셔서 unity-sysfont plugin과 standalone demo package를 다운받습니다. NGUI를 사용중이신 분은 NGUI compatibility package도 다운받아서 진행하시기 바랍니다. 일단 전 NGUI가 없기 때문에 제외하고 진행합니다.

 일단 저는 ChinaFontTest라는 빈 프로젝트를 만들었습니다. Assets -> Import Package -> Custom Package를 선택해 다운받은 2개의 패키지 파일을 임포트 합니다. 위 스샷에서 아래 3개 있는것이 demo 패키지입니다.
 unity-sysfont-demo Scene 파일을 열어보면 플레이하기도 전에 위와 같이 에러가 발생합니다.
DllNotFoundException: SysFont
SysFont.DequeueTexture (Int32 textureID) (at Assets/Plugins/SysFont/SysFont.cs:257)
SysFontTexture.Destroy () (at Assets/Plugins/SysFont/SysFontTexture.cs:348)
SysFontText.OnDestroy () (at Assets/Plugins/SysFont/SysFontText.cs:435)
DllNotFoundException: SysFont
SysFont.QueueTexture (System.String text, System.String fontName, Int32 fontSize, Boolean isBold, Boolean isItalic, Alignment alignment, Boolean isMultiLine, Int32 maxWidthPixels, Int32 maxHeightPixels, Int32 textureID) (at Assets/Plugins/SysFont/SysFont.cs:241)
SysFontTexture.Update () (at Assets/Plugins/SysFont/SysFontTexture.cs:319)
SysFontText.Update () (at Assets/Plugins/SysFont/SysFontText.cs:414)
구글링을 해보니 원작자께서 말하길 아직 유니티3D 윈도우 에디터 환경은 지원하지 않는다고 합니다. 이하는 맥에서 정리를 다시 시작해봤습니다. 그런데, 맥도 위와같은 에러가 발생하네요... 게다가
License error. Plugins are only supported in Unity Pro!
SysFontTexture:Update() (at Assets/Plugins/SysFont/SysFontTexture.cs:339)
SysFontTexture:Update() (at Assets/Plugins/SysFont/SysFontTexture.cs:319)
SysFontText:Update() (at Assets/Plugins/SysFont/SysFontText.cs:414)
유니티 프로가 필요하다는 라이센스 에러까지 뿜어내는군요. 하긴 github에 요구사항을 보면 Unity 3.5 Pro 이더군요. 저는 작년에 무료로 풀렸던 라이센스라 Pro가 아니거든요 ㅜ.ㅜ 이렇게 물건너 가는건가? 하다가 혹시나 해서 빌드를 해봤더니,
 일단 빌드는 되었습니다.
 실행도 잘 됩니다! 유니티 프로가 아니어도 에디터에서만 안될 뿐 실제 빌드해서 실행까지 문제가 없네요. 아이폰은 없어서 못해봤지만 안드로이드도 잘됩니다.
2. Create Dynamic Font
 인스펙터에 여러가지 속성이 많은데요, unity-sysfont github에서 관련 내용 확인하시면 됩니다.
unity-sysfont demo는 유니티 툴상에서 빈 GameObject를 만들어 SysFontText 컴포넌트를 붙여준 것들이죠. 하지만 실무에서는 저렇게 일일이 툴에서 만들지 않고 코드로 동적으로 도 만들어야 할텐데요, PixelPerfectResizer.cs에 SysFontText를 동적으로 추가했던 과정을 정리해보겠습니다.
게임 오브젝트가 멤버가 하나 있어야겠죠.
testFont = new GameObject();
testFont.AddComponent<sysfonttext>();
그리고 Awake()에 위와같이 게임오브젝트를 만들어 SysFontText 컴포넌트를 Add해줬습니다.
if (cam != null)
{
if ((cam.orthographicSize != _lastOrthographicSize) ||
(cam.pixelWidth != _lastPixelWidth) ||
(cam.pixelHeight != _lastPixelHeight))
{
_transform.localScale = new Vector3((int)(cam.orthographicSize *
2000f * cam.aspect / cam.pixelWidth) / 1000f,
(int)(cam.orthographicSize * 2000f / cam.pixelHeight) / 1000f,
_transform.localScale.z);
SysFontText sysFont = testFont.GetComponent<sysfonttext>();
sysFont.Text = "Test Font";
sysFont.FontSize = 50;
sysFont.AppleFontName = "Helvetica-Bold";
sysFont.MaxWidthPixels = 2048;
sysFont.MaxHeightPixels = 2048;
}
}
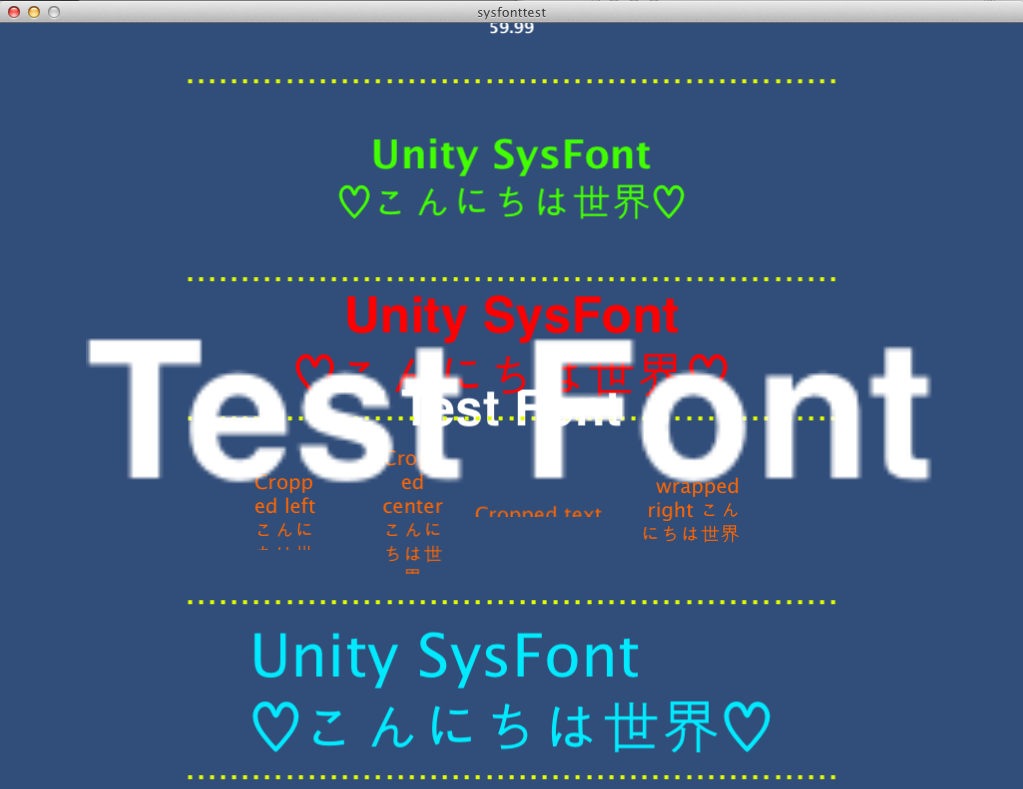
다음에 Update 안에서 위와같이 SysFontText 컴포넌트 설정을 해줬습니다. 이제 실행해보면,
 나오기는 하는데 기존에 폰트보다 텍스쳐도 구리고 너무 크게 나왔네요. 폰트 사이즈도 같은 50인데 말이죠.
 새로 만든 testFont의 transform.parent에 transform을 넣어주니 잘 되네요.
이렇게 말이죠. UnitySysFontFPSCounter.js에 있는거 보고 컴포넌트만 붙여줬더니만...
자, 다음으로 이 작업을 꼭 Update()에서 해야하나 싶어 Update를 Start로 바꿔줬습니다.
 잘 되긴하는데 기존에 만들었던 게임 오브젝트가 남아있네요.
 이렇게요. 그래서 지워준 후 실행했더니 잘 됩니다. 아직 유니티 초보라 잘 모르는데 동적으로 생성한 게임오브젝트가 GC에 의해서 자동으로 안 지워지는 건지, 일일이 지워줘야하는건지..
참고로 이렇게 좌표를 이리저리 바꿔보니 화면 정중앙이 0, 0 중점이고 y는 +가 위고 -가 아래 더군요.
다음으로 이런 심플한 데모 프로젝트가 아닌 큰 프로젝트?인 AngryBots에 SysFont를 붙여보는 것을 정리해보겠습니다.
1. unity-sysfont 설치부터 데모 실행


DllNotFoundException: SysFont
SysFont.DequeueTexture (Int32 textureID) (at Assets/Plugins/SysFont/SysFont.cs:257)
SysFontTexture.Destroy () (at Assets/Plugins/SysFont/SysFontTexture.cs:348)
SysFontText.OnDestroy () (at Assets/Plugins/SysFont/SysFontText.cs:435)
SysFont.QueueTexture (System.String text, System.String fontName, Int32 fontSize, Boolean isBold, Boolean isItalic, Alignment alignment, Boolean isMultiLine, Int32 maxWidthPixels, Int32 maxHeightPixels, Int32 textureID) (at Assets/Plugins/SysFont/SysFont.cs:241)
SysFontTexture.Update () (at Assets/Plugins/SysFont/SysFontTexture.cs:319)
SysFontText.Update () (at Assets/Plugins/SysFont/SysFontText.cs:414)
License error. Plugins are only supported in Unity Pro!
SysFontTexture:Update() (at Assets/Plugins/SysFont/SysFontTexture.cs:339)
SysFontTexture:Update() (at Assets/Plugins/SysFont/SysFontTexture.cs:319)
SysFontText:Update() (at Assets/Plugins/SysFont/SysFontText.cs:414)
License error. Plugins are only supported in Unity Pro!
SysFont:QueueTexture(String, String, Int32, Boolean, Boolean, Alignment, Boolean, Int32, Int32, Int32) (at Assets/Plugins/SysFont/SysFont.cs:243)
SysFont:QueueTexture(String, String, Int32, Boolean, Boolean, Alignment, Boolean, Int32, Int32, Int32) (at Assets/Plugins/SysFont/SysFont.cs:241)
SysFontTexture:Update() (at Assets/Plugins/SysFont/SysFontTexture.cs:319)
SysFontText:Update() (at Assets/Plugins/SysFont/SysFontText.cs:414)


2. Create Dynamic Font

unity-sysfont demo는 유니티 툴상에서 빈 GameObject를 만들어 SysFontText 컴포넌트를 붙여준 것들이죠. 하지만 실무에서는 저렇게 일일이 툴에서 만들지 않고 코드로 동적으로 도 만들어야 할텐데요, PixelPerfectResizer.cs에 SysFontText를 동적으로 추가했던 과정을 정리해보겠습니다.
private GameObject testFont;
게임 오브젝트가 멤버가 하나 있어야겠죠.
testFont = new GameObject();
testFont.AddComponent<sysfonttext>();
그리고 Awake()에 위와같이 게임오브젝트를 만들어 SysFontText 컴포넌트를 Add해줬습니다.
if (cam != null)
{
if ((cam.orthographicSize != _lastOrthographicSize) ||
(cam.pixelWidth != _lastPixelWidth) ||
(cam.pixelHeight != _lastPixelHeight))
{
_transform.localScale = new Vector3((int)(cam.orthographicSize *
2000f * cam.aspect / cam.pixelWidth) / 1000f,
(int)(cam.orthographicSize * 2000f / cam.pixelHeight) / 1000f,
_transform.localScale.z);
SysFontText sysFont = testFont.GetComponent<sysfonttext>();
sysFont.Text = "Test Font";
sysFont.FontSize = 50;
sysFont.AppleFontName = "Helvetica-Bold";
sysFont.MaxWidthPixels = 2048;
sysFont.MaxHeightPixels = 2048;
}
}
다음에 Update 안에서 위와같이 SysFontText 컴포넌트 설정을 해줬습니다. 이제 실행해보면,


testFont.transform.parent = transform;
이렇게 말이죠. UnitySysFontFPSCounter.js에 있는거 보고 컴포넌트만 붙여줬더니만...
자, 다음으로 이 작업을 꼭 Update()에서 해야하나 싶어 Update를 Start로 바꿔줬습니다.
sysFont.transform.position = new Vector3(0, 62, 0);
참고로 이렇게 좌표를 이리저리 바꿔보니 화면 정중앙이 0, 0 중점이고 y는 +가 위고 -가 아래 더군요.
다음으로 이런 심플한 데모 프로젝트가 아닌 큰 프로젝트?인 AngryBots에 SysFont를 붙여보는 것을 정리해보겠습니다.


댓글
댓글 쓰기